Did the car make it to Eurofest?
So, we dragged our tired souls
out of bed at sunrise the following morning, Thursday, and were working on the
car outside the house again by
I only took 2 pictures that day,
just shows how tired I was, and how little time we had for stopping work. We
worked non-stop until around
Afterwards, my Dad had to return
for
|
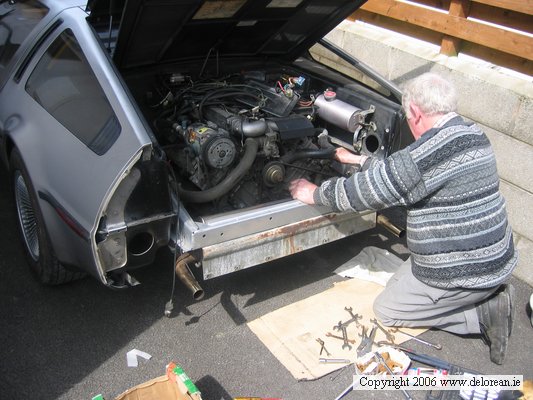
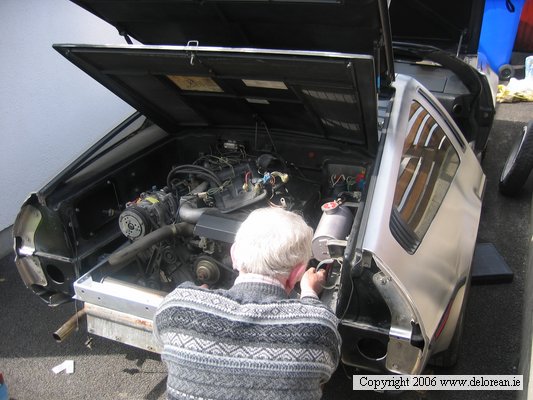
PJ and I worked on through the
afternoon, mounting the handbrake calipers, engine
wiring loom, radiator shroud, battery, etc. It was very useful having PJ's DeLorean beside us to use as a reference!
The moment of truth came - we
hooked up the battery and turned on the ignition. All the ignition lights came
on first time - a good sign! I tried to turn over the engine, and CLICK is all
that happened. The starter motor was seized from not being used for the past 18
months. Off it came again, and PJ loosened it up, and sprayed lubricant into
it. Then, PJ noticed that a small wire which appeared to have been soldered
onto the starter was snapped off. I didn't have a soldering iron, so went
driving around Baltinglass, trying to find a solution. No-one had a soldering
iron, but the guys in the local garage came up with a great solution - using a
small cable connector, modified slightly so that one side would fit onto the
remaining piece of solder and wire on the starter. It worked perfectly, and
after refitting the starter to the DeLorean and trying to start it again, the
engine turned this time! The technical term for this kind of a fix when you
have no other options is called "pulling a MacGyver".
We threw a little fuel into the
intake to help it to start, and it fired up straight away. It ran for 5
seconds, and then died.
First thing we did was ensure we
were getting power to the fuel pump, which we were not! Then I realised I had
forgotten to hook up the headlight wiring harness, which was breaking the
circuit loop in that area. Doh!
Ok, now that we were getting
power to the fuel pump, we tried again. The engine still wouldn't fire without
the help of more fuel being thrown into the intake. Obviously, fuel was not
getting from the tank at the front of the car to the fuel distributor in the
engine bay at the rear.
We started by taking off the main
feed line from the fuel filter to the distributor, and found that no fuel was
coming out there. Then we checked the fuel line going into the filter from the
accumulator, to see if the filter was somehow blocked. No fuel here either.
I began to wonder if I had
connected the fuel lines backwards at the front of the car. I was sure I had
done them correctly, but the symptoms we were seeing could be from the
feed/return fuel lines being crossed. We swapped the lines at the front, but
still the engine would not fire.
We then decided to pull the fuel
pump out, and make sure it was actually working. We removed the pickup hose
from the bottom, and ran the pump for a second, and there was plenty suction
there. We noticed when taking off the fuel pickup hose that there was a small
cut in the hose at a 90 degree bend section, just before it attached to the
bottom of the fuel pump. Thinking this could be causing the problem,
we cut the 90 degree bend off, and attached the hose to the pump again. This
caused more problems later unfortunately. I'm sure anyone familiar with
DeLoreans will realise the mistake we've just made!
The time of day is now after
Now all that remained to get the
car running was replace this section of fuel hose! With all the garages closed,
and the motor store also closed, this was going to be hard. We looked under the
hood of our other cars, 1998 Renault Clio, and 1998 Ford Escort, but the fuel
lines in here were either solid metal pipe, or too short. I called on one local
mechanic, but he did not have any fuel hose at his house, or his workshop.
To cut a long story short, we
eventually took the fuel return line hose from the pump, and used this as the
main feed line off the pump. Then, we too the coolant overflow pipe off the
coolant bottle, and used this as the fuel return line back into the fuel tank.
We used the coolant pipe as the return line, as this would not be as high
pressure as the feed line.
Now we tried to start the car
again, and it fired up right away! It idled fine, but when you tried to rev the
engine, it spluttered.
Assuming it just needed to have a
drive to clear any bad fuel in the lines, we decided to start filling and
bleeding the cooling system. This didn't take long, and caused no issues.
We then filled the brakes and
bled them. Again, this was easy, and worked no problem. The clutch was then
filled and bled.
Now the car was ready to drive!
Or so we thought....
It is now about
We had just been through the
entire fuel system only an hour ago, so we were a bit stumped why it was still
getting starved of fuel. We tested the pipes again at the front, and then were
clear of blockages. Then, we remembered that 90 degree bend we cut from the
pickup hose in the tank - DOH!! Now that the 90 degree bend was no longer
there, the now straight pickup hose was getting kinked in the tank, and not
letting enough fuel through.
We had no more fuel (or any other
type) hose left to replace this with. PJ had a brainwave - mount the fuel pump
higher in the fuel pump boot, so that the angle the pickup hose meets the
bottom of the fuel pump is not so severe. We did it, and it worked!! Back in business.
We piled our tools and bags into
the cars, and went inside for a cup of tea. Apart from a bowl of soup, we
hadn't eaten or taken a break all day (since
The car drove perfectly all the
way to
We arrived at the Beechlawn House Hotel in Dunmurry
at around
As I said, we were so busy
getting the car running on that last day that I didn't take any pictures
unfortunately, but I've attached some pictures below of Deirdre and I with the
finished car at the original DeLorean factory, 1 day after it was reassembled!
|
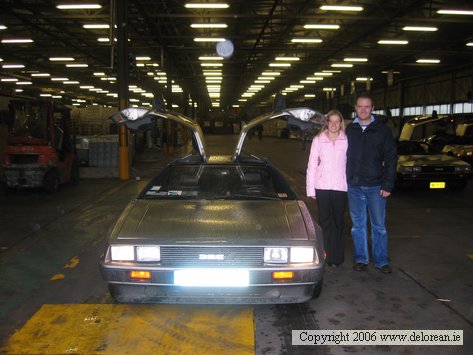
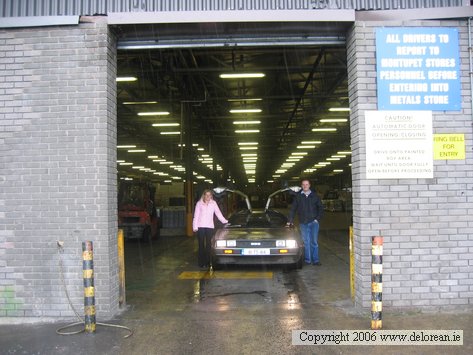

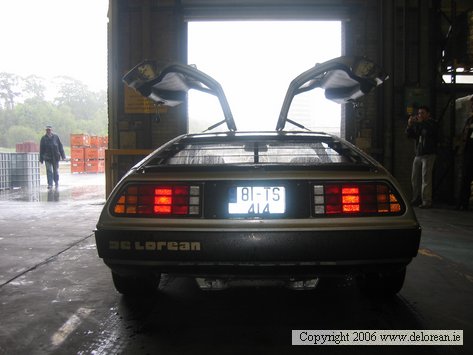
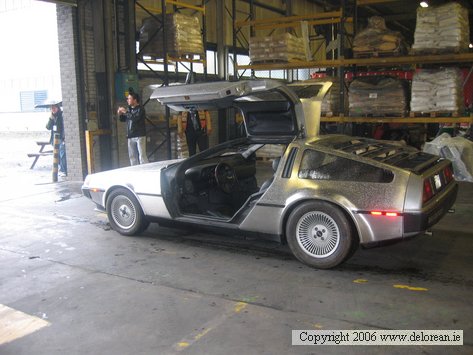
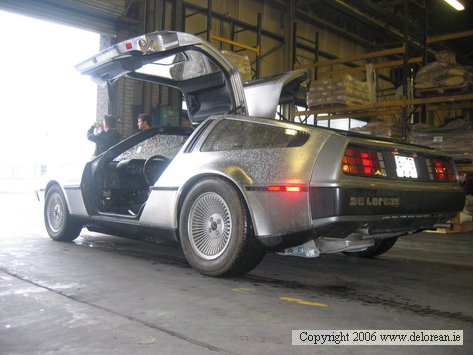
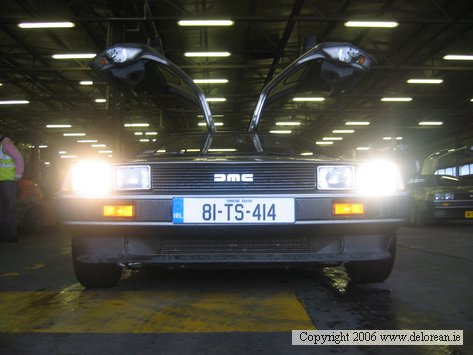
What is really cool about these
pictures is that the doorway my DeLorean is just about to exit is the original
doorway where the finished cars exited the factory and went onto the test
track! So 25 years after it was first built and driven out this door, and 1 day
after the car was rebuilt, my car drove through this doorway again and went for
a few laps of the original test track!!
Anyway, this concludes the frame
restoration of my DeLorean! Hope you enjoyed reading these pages, and that it
might inspire some others to tackle this job. Sooner or later, every DeLorean
owner is going to need to do "something" to stop rust from destroying
their car.
To anyone who is considering
doing this to their car, I highly recommend it, especially if you intend owning
the car for a long time. Its not a hard job - just
lots of work. You don't have to be a mechanic to do it, its all only nuts and bolts, and I've no doubt that anyone who puts their mind to
it can do it themselves. As George McFly said
"If you put your mind to it, you can accomplish anything!".
It does help to have family and
good friends help you with a job like this, and I definitely got a huge amount
of help from various people. Thanks to the following people for all their help:
Thanks to my wife Deirdre and my
daughter Katie for putting up with me for the past few months! I spent a lot of
time working on the project during my evenings after work, especially when
coming up to the deadline. Even after being away in
My brother Maurice - Maurice
helped me on many occasions during the restoration, from taking the car apart
to cutting out rusty metal, to helping reassemble the chassis. Thanks Maurice!
My Dad John - Dad did many trips
up and down the country hauling full car loads of Delorean
parts, including the engine/transmission. He put up with his garage being taken
over with pieces of my car for about a year, and he also gave me loads of help
putting the chassis back into the car, so thanks a million Dad!
My cousin Gerard Liston - thanks Gerard for the loan of your trailer to
transport the chassis to Galco Steel in
PJ Kennedy - PJ stopped by to
help me get my car running on his way to Eurofest.
What was hoped to be a few hours work turned into a marathon 11 hours with no
break for PJ, and he refused to give in until we had both cars driving to
Aaron
Sean O'Brien - Sean did all the
repairs to my chassis, and upgrades to my front control arms. He also replaced
all my suspension bushings and ball joints, and gave me the use of his workshop
and tools for a few weeks. He did a brillant job
welding my frame, and I would highly recommend him to any classic car owner who
needs welding repairs done to their cars. Thanks Sean!
Adrian Sheehan - thanks Adrian
for coming down and spending a few hours helping me figure out the layout of
the fuel, brake, coolant, clutch line etc, and for helping to install them!
My neighbour Mark Oliver gave me a hand on many occasions with the frame - stripping the epoxy and cutting out the rust, and also lent me various tools when I needed them, thanks a million Mark!
Thanks to Ed Uding for all his great advice on how to galvanise DeLorean frames. The way Ed prepares the frames for galvanising is definitely the best method (thermal stripping), if I do another frame someday I will probably ship the repaired frame to Ed to be stripped of epoxy and galvanised. Thanks Ed for the good advice!
Paul O'Malley - thanks for the loan of your engine hoist, and for the new steering shaft!
Galco
Steel in
K & M Mobile Cleaners in Castledermot - thanks for a great job sandblasting my
chassis!
And finally, thanks to you the
reader for following this restoration! Please let me know if you enjoyed
reading all this, and if you are planning a similar job I'd be happy to answer
any questions!
Now I'm going to stop typing and
go for a drive!!! See ya....
